 Maybe
- just maybe - you cant taste the difference between organically produced vegetables
and the other sort. I think you can, but the jurys still out on this one (assuming
theyre both equally fresh, which is rarely the case).
Maybe
- just maybe - you cant taste the difference between organically produced vegetables
and the other sort. I think you can, but the jurys still out on this one (assuming
theyre both equally fresh, which is rarely the case). Backyard Poultry Keeping
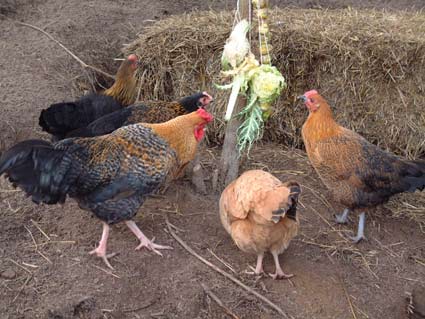
A guide for the beginner by Alec Fry. Photos show the home-built henhouse and some of the flock owned by EHSS member Sam St.Clair-Ford. The gadget illustrated on the henhouse opens and shuts the door automatically, and is used by several members; details can be found on www.axt-electronic.de.
Maybe
- just maybe - you cant taste the difference between organically produced vegetables
and the other sort. I think you can, but the jurys still out on this one (assuming
theyre both equally fresh, which is rarely the case).
However, when it comes to eggs, theres no comparison between home-produced and commercially produced - and I include free range in the latter. Recently we were forced to buy a few eggs when my pure-bred flock all decided to take a short rest at the same time. We tried every so-called free range supplier we could find, but only when a friend gave us some from his own garden did we enjoy our lightly boiled breakfast eggs once again.
Ive been involved in keeping backyard hens for well over fifty years now, starting with the time I helped my father when he returned from the war. I honestly feel that everyone should keep their own hens, no matter how small their garden. Theyre no trouble at all to keep and give a great deal of enjoyment in return, quite apart from the delicious eggs - and by doing so, youll be effectively reducing the numbers cruelly restricted to tiny battery cages or even those which are offered the theoretical opportunity but not the encouragement to become so-called free range (excuse my cynicism here!)
Here, then, are my ten pointers to keeping happy, productive hens:
Buy your stock from a good supplier. That way youll have birds of a productive strain that are inoculated and well reared, and the supplier will help you with any questions you may have.
Start off with good egg-laying hybrids at about 20-22 weeks old, which will
start laying in about a month or so; about one bird per family member is usually
sufficient, or youll be forever wondering how to dispose of your surplus. You
can try the more attractive but less productive pure breeds later. Hens dont
need the company of a cockerel in order to lay, so you neednt worry about sleepless
nights. Each year or so, our Group places a combined order for several hundred
point-of-lay pullerts at a considerable saving in cost.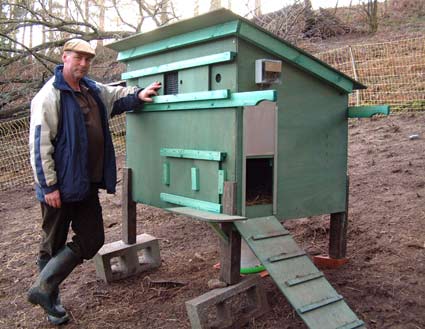
Buy (or make) a well-ventilated henhouse thats designed for at least twice as many hens as you plan to keep - that way the droppings will be dryer in the winter months and youll rarely need to clean them out. The house and nestbox should open from outside the run, for convenience.
Give them access to clean grassland, even if only a few square yards per bird. Dig it over thoroughly once a year and re-seed in March (keeping the birds indoors or in a separate pen for a few weeks while you do this). There should however be a dry, dusty corner as they really do enjoy a good dust-bath!
Their run should have 6ft high netting, with the bottom 6 inches sunk into the earth. I find its cheaper to use two strips of rabbit netting, as this is made in bulk for farmers and so is a bit cheaper - about £35 for 50 metres. I like to divide the run into two separate areas, so that alternate halves can have a rest.
Once a year, scrub out the house with Jeyes Fluid or a similar disinfectant, paying particular attention to the ends of the perch and the bottom of the nest box.
Buy a large hopper for feed, but a smaller one for water to avoid the temptation of not changing it at least every other day.
Make contact with other poultry keepers, through a poultry club or a group like ours. Then, when the time comes to dispatch your ageing hens (in two or three years time, in all probability), youll have someone who can show you how to do this humanely and effectively, or maybe hell do the deed for you.
Buy only the best, high-protein (about 17%) pelleted or powdered feed if you want the maximum egg production. Examine the label thats hidden at the bottom of the bag, looking for natural ingredients and checking its within its sell-by date. You certainly can feed a few kitchen scraps (although not meat products), but if the amount becomes too great the proportion of protein will be reduced and youll get fewer eggs. I prefer the pellets, as they produce less waste and are less liable to attract rodents, and I cannot agree that they are more likely to encourage feather-pecking.
Give fresh green vegetables in addition to the pelleted feed: most greengrocers dispose of cabbage tops and the like without charge. Tip your garden weeds into the run and theyll be more effectively recycled than on the compost heap! Your hens will also need some grit unless you're on naturally gritty ground.
Obviously the access from the chicken house to its run should be shut at dusk and opened when it is light again, to reduce the risk of fox attacks. If you find this inconvenient - perhaps because you like to go out in the evenings and do not know anyone who can help with this job- you can buy a gadget known as the "Electronic Doorkeeper" which does the work automatically. Several members are using one and find it very reliable. It can be ordered direct from the makers in Germany - see their website at www.axt-electronic.de.
One of the less welcome tasks that befalls a poultry keeper is the dispatching of birds, either for food or simply because they have reached the end of their laying lives.
Most books recommend the technique which involves dislocating the neck. This is regarded as a quick and humane method in the hands of an experienced keeper. However, it needs practise and patience to learn, and the learning process can be unpleasant; just one experience of a head being pulled right off at one extreme, or a hen left bruised but otherwise unaffected at the other end of the scale, can put many people off the idea.
I have therefore devised a humane poultry killer which does the job quickly and effectively, which has been in regular use by myself and many friends for over twenty years. I include full constructional data here, on the understanding that this information is for the user's own needs and is not put to any commercial use. No guarantee is given that the device conforms to any recognised standard, and users should check for any relevant legal requirements relating to their own country.

You need the following:
One base consisting of a piece of 12mm or half-inch ply, 16" x 7".
Two 16" lengths of 3" x 2" planed timber.
One 36" length of 3/4" outside diameter heavy galavanised water or gas pipe.
One 6" No.6 coach bolt, nut and washer.
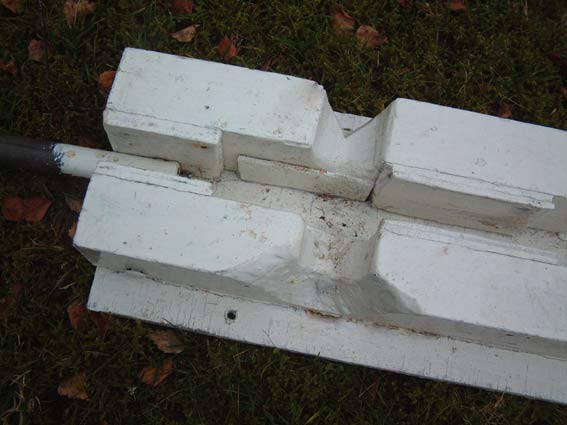
Screw and glue the 3x2 on the base, the 2" width on to the base. The distance between the two pieces should be just a little wider than the pipe. Drill through the sides and pipe to allow the pipe to swivel as near to the base as possible.
Then, 4.5" along from the pivot, make two cut-outs in the 3x2. The lowest part of each cut out should be 1.5" up from the base. One cut-out should be a "V", the other a "U" shape. The sample illustrated has been adjusted and refined over the years, and the packing pieces are not needed if these dimensions are followed.
To use the device, hold the hen by its feet so that the neck naturally forms a slight arch. Standing on the "U" side of the killer with the pipe extended out from the base, lower the neck into the cut-out. Bring the pipe across the neck and stand briefly on the end to ensure a quick action. The wings will flap briefly and the bird will be dead. After a few seconds more, a further fluttering due to reflex action will be noticed. Then tie the legs together with baler twine and hang from a nail to allow the blood to drain into the neck. If you pluck within a few minutes the feathers will be easier to remove.